The life and times of a normal university student

06 December 2014

How to Stretch Your Ears, A Collection of Information Gathered From the Internet Sprinkled with Anecdote

WARNING: This post contains numerous (excessive, really) instances of the word "flesh"
ANTIWARNING: Although (as with any body mod) numerous pictures of stretching gone wrong exist at the top of a google image search, I don't like looking at them so I didn't put them here. If you're the sort who needs to see everything that goes wrong before you commit to a body mod, then I'm sure you know what to do.
I decided a few weeks ago that I really, really wanted to stretch (aka gauge) my ears. For the uninitiated, this means taking a normal ear piercing, like the kind you get in Claire's and that fit snugly around the kind of earring you buy anywhere, and shoving increasingly large things through it until your earlobe stretches around it. You've probably seen someone with earlobes you could put a finger through, or learned about tribes and ancient civilizations that could put a dinner plate through their ears and/or lips. Incas and various african tribes are who I think of first, but there are lots of others. For me, there is no religious, cultural, or traditional significance to it. As with all my ear, facial, and dermal piercings and my tattoo, I just think it looks really damn cool.
I'm not as cool as this lady, though.
Disclaimer: before doing this, please continue to read other things on the internet about how to stretch your ears. If you're unsure about exactly what you're supposed to do, go find a tattoo/piercing parlor and talk to the people who work there. If no one has gauged ears, someone has almost certainly read up on it, and they might do at least the first stretch for you or have tapers and plugs to sell you.


Stretching Terminology

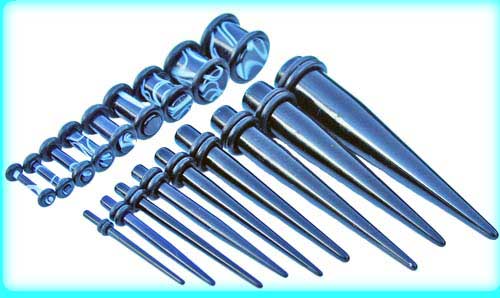
Taper: Conical tool with a base the size of the gauge you're aiming for that tapers to a point so you can gradually stretch your ears. May be straight or curved for stretching depending on what you're most comfortable with, as long as they're good materials like glass, stainless/surgical steel, or titanium. Conflicting information about the proper use for tapers indicates that you may be able to leave a taper in long-term and slowly stretch up a gauge, but you should not do that if it makes your ear hurt because tapers are asymmetrical (and heavy, at the larger sizes) and could damage your lobes. The small gauge tapers are sharp and kind of stabby, since they start at about the diameter of a normal piercing. I let one rest in my left ear for about an hour, but 14 is skinny and light weight compared to my unstretched lobe. I suspect that the warning about not leaving stretching tapers in for a long time is focused on the larger gauges, probably starting around 4. Decorative tapers, such as the spiral and curved hooks or the long straight spikes, are often a lighter weight material and designed to be worn for a day at most, as they're not antimicrobial like stainless steel or glass.
Stainless steel stretching tapers (14g) with 18g earrings and a quarter for size comparisons
Decorative polymer clay taper
A whole new spin on "earplug"
Plug: Short fat earring with a varying number of flared ends, depending on the gauge. Larger gauge plugs a lot of times are double flared, meaning you have to stretch your ear a little larger than the gauge you're already at while you put the plug in; single flared plugs have one straight edge the size of the gauge and one flared end to keep the plug from slipping through. Single flares need to be held in place with o-rings that function like the back of a normal earring. Smaller gauge plugs usually have a single flare because the flesh around the hole is too thick to wiggle a flare through.
Tunnel: Plug that is hollow.
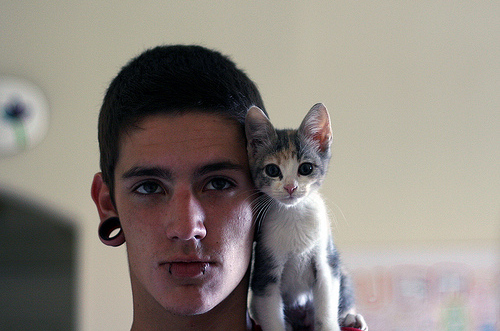
The tunnel is on the other side from the cat. 
Spacer: As far as I can tell, something that you put in a stretched piercing. A perfunctory google search pulls up tunnels, plugs, and tapers, as well as funky-shaped plugs and unexpected items being used as plugs. My thoughts are that it's like I have four earrings in my right ear, two studs and two captive bead rings. All four are earrings, but they're different types. Similarly, spacer seems to be the catch-all word for plugs, tapers, and tunnels that you use when you're not trying to be specific.

Gauge: Technically, only refers to the size of a plug or hole (as depicted by this handy chart). Often used as a synonym for a plug or as  a verb when talking about stretching your ears (I gauged my ears, I'm gauging my ears, how to gauge your ears). The default size for lobe piercings at places like Claire's are 18-20 gauge.
Stretch: The more accurate way to refer the act of making your ear piercing larger.
I want my holes to look like that. Damn.
Stretching Kit: Often a more cost-effective way to stretch, since you don't have to buy individual tapers and plugs and hope they're the same size; kits are usually a great value because you pay less for all the tapers and plugs together than you would for the same number of tapers and plugs bought individually.
This stretching kit is pretty, but I wouldn't buy it because it's acrylic. 
14g-0g stainless steel stretching kit (link to Amazon below) with two plugs and two tapers per gauge. All O-rings included. Quarter included for size comparison. CAVEAT: plugs have little cut-outs (for O-rings to rest in) that can catch on your lobes and be all painful and stuff.
Fistula: The inside of your piercing, or the skin that forms the tunnel through the flesh of a healed piercing. The bit of you that touches the post of an earring. Medically, refers to any tunnel though any tissue regardless of what caused the tunnel to form (birth defect, injury or trauma, piercing).
Blowout: Put simply, when you taper wrong and break the fistula. Put descriptively, blood and pain and flaps of skin exploding out the back of your earlobe. Depending on the size of your stretch and the personal habits of your ears, you can have something as severe as your earlobe getting ripped in half or something as comparatively mild as cat butt, which is when your earlobe looks like it has a puckered little anus in it instead of a lovely smooth hole. In the middle of these is having bloody flaps of skin hanging out the back of your ear and needing to downsize your plugs and coddle your ear until the loose flaps of fistula skin can be coaxed to rejoin the earlobe flesh. Blowout can be avoided by stretching very slowly, stopping when you feel pain, and using smaller increments when stretching if all else fails (taping or using the odd-numbered gauges). All sources point to not using tapers after 2g, although most taper kits go up to 0g or even 00g. At that point, I'm pretty sure that your holes are delicate and need taping no matter how stretchy your lobes have been so far.
Ear Cheese: The dead skin cells that slough off your fistula, work their way out of the piercing hole, and accumulate around the jewelry. I get it on all my piercings that don't have hoops; it gathers on the ends of my eyebrow barbell, around the jewel on my nose stud, and in the backs of my normal earrings. Smells like foot cheese. The skin cell sloughing is totally normal and happens on all of your skin, but in the case of piercings it has nowhere to go and gets all gunky instead of turning into dust or washing off in the shower.

Tips, Tricks, and Miscellany

  • Stretching Kits: Look for stainless/surgical steel or titanium, particularly if you have infection-prone ears; acrylic can be pretty but it's porous and hard to sterilize. Good steel and titanium are hypoallergenic and less prone to bringing bacteria along for the ride. Speaking for myself, my ears corrode anything less than solid 24 carat gold or stainless steel, including sterling silver and "nickel free" earrings, leaving a pitted earring post and a lot of pus and goop in their wake. I can wear lesser metals for a day, but no longer. Definitely don't go for wood stretching plugs or tapers; they're great for short periods once you've stretched but not for the stretching itself. Stretching makes tiny rips in your skin (microscopic; if you see blood, stop immediately); with an organic, porous material like wood, the skin will heal onto the plug instead of just adding skin cells over the wound. Also for stretching you want the smoothest surface possible on a microscopic level to prevent more injury than you're already inflicting.
  • If you get your ears pierced with the intention of stretching, you can ask your piercing professional to start with a larger gauge piercing. Professionals, most often found at tattoo parlors, use hollow needles that remove a plug of flesh the size of the earring rather than a gun that pokes a hole and makes the flesh stretch around it. Once your piercings heal, you'll be a few months ahead of where you would have started with small gauge piercings, and you're overall less likely to have complications during healing. 
  • The internet recommends lots of lubrication for your tapers; vitamin E oil and Jojoba oil come highly recommended. Jojoba supposedly thickens your lobes, making it great for bigger gauge stretches where your lobe gets so thin that tearing it is a real and terrifying possibility. Vitamin E encourages collagen formation, keeping your lobes elastic, which is great for stretching to any gauge. I got a bottle of Vitamin E hair treatment oil at Sally Beauty for less than $3, so it's easier to work with (has various oily additives) and way, way cheaper than pure, food-grade vitamin E. CVS sold about the same size bottle of food-grade oil for about $10. PRO TIP: you don't need food-grade Vitamin E if you're just rubbing it on your body. Big plus: all the vitamin E you rub on your ears will make your fingers really soft, strengthen your nails, and nourish your cuticles all at the same time. If you're using non-Vitamin E oil, you'll still get soft fingers and probably slightly healthier cuticles. You can find most pure oils online for a pretty reasonable price; start with a 2 oz bottle at most, unless there is a killer deal. 
  • Think about the size you're aiming for. If you want to wear big huge plugs that are measured in inches instead of millimeters, go for it, but remember that there is a point of no return for earlobes. If you anticipate working someplace where gauges aren't acceptable (like the military or PetSmart (according to my friend who works there) or anything that prides itself on being "family friendly"), don't go too big unless you can afford the surgery to close your holes. For a lot of people, the point of no return is 2g-0g, but every ear is different. Just because your cousin's lobes came back from 00g (a size up from 0) doesn't mean yours will come back from 2g. Play it by ear (hahaha) and stop when it feels right. I don't want big huge finger-accommodating holes, so I'll be stopping around 4g, maybe 2g or even 0g if I'm feeling really bold. The problem with coming back from big holes is that after the surgery they'll be mostly scar tissue and apparently piercers don't like working with damaged tissue. And even if you do get them pierced again, good luck getting them to gauge back up once you've moved on to a profession that allows creative expression. 
  • Something else to keep in mind that I didn't pay attention to until it happened to me is that your own ears are different. My right ear took to my 14g taper like a fish to water, but my left ear was really stubborn about it. I left the taper half-in my left ear, stretched my right ear all the way in about 5 minutes, switched out the right taper for the plug, pushed the taper a little further into my left ear, did stuff on the computer for about an hour, pushed the left taper the rest of the way in, waited ten minutes until it stopped hurting, and then got the official plug in. My right ear was a little warm and stiff but didn't hurt unless I jostled the plug, but my left ear was warm and swollen as soon as I got the point of the taper all the way through my lobe. Old Lefty was fighting the stretch the whole time, and I went slower and used more oil than on my right ear. The moral of the story is, don't fight your ear. If you have a really stubborn lobe, go find the odd-numbered gauges or use the taping method to gradually increase your gauge. 
  • Just like with normal earrings, avoid sleeping with heavy or dangly jewelry in your ears. In the case of normal piercings, it will just be painful when you roll over and catch the earring on something, but in the case of large gauge stretched ears you can rip your lobes or cause them to stretch unevenly. 
The Actual Stretching

The Taper Method 

  • Start with 14g or 16g, depending on your original piercings. I've had my normal-size, probably 18g holes for over 10 years, so I figured I could jump straight in at 14 based on some advice from the internets, but I probably would have had fewer problems with Old Lefty if I had started with 16g. If you've just recently healed, make sure to find out the gauge used to pierce and use the next size up. Do not skip gauges. EDITED TO INFORM YOU that only going up by twos (from 14 to 12, for instance) is MUCH MUCH easier than skipping a size even if you've had your piercing for years and years like I have. Spend the extra money to get the appropriate gauge tapers and plugs if they aren't included in the kit you like best; your fistulas will thank you for not blowing them out.
    So little! Incidentally, does anyone else have creases in their earlobes?
  • Massage your lubricant of choice (Vitamin E in my case) into the lobe, then on the taper and your fingers. I didn't have any trouble with keeping a grip on my 14g stainless steel tapers, and had to keep replenishing my oil. 
    Hair treatment oil is much cheaper than pure, food grade oil
  • Gently push the pointy end of the taper through the piercing as if you were putting in a normal earring. 
    Just like we've done a million times, boys. 
  • Stop and add oil, turn the taper, or carefully pull the taper out and start again after redoing the whole rubbing oil process if your taper is getting stuck. If it hurts, be super careful and either wait with the taper half through or take it out and try again some other time. If you need motivation to go slowly, do a google image search for "ear blowout" and see how you feel.
    This was about where Lefty stopped the first time
    The shiny on my poor red left earlobe is tons and tons of oil.
  • Once your taper is almost all the way through and isn't getting any bigger, get your plug (no more than one flare) and line it up with the blunt end of your taper. Use the plug to push the taper out of your ear and BAM, you've stretched your earlobe. 
    Taper is almost all the way through my right lobe...

    BAM
  • Put o-rings on any unflared ends. 
    The black thing on the end of the fourth earring from the top is an o-ring
  • Remove plugs, clean lobes with nothing stronger than salt water, as if you just got them pierced, and massage with oil a few times a week until the plug can be easily and painlessly removed and replaced. Some sites recommend taking the plugs out daily for cleaning starting right away. I certainly recommend taking the plugs out for cleaning but I'm leaving mine alone until my lobes stop throbbing or for two days, whichever comes first. As I've said before, all ears are different. UPDATE: taking my plugs out a few days after stretching was super painful. My lobes kept getting caught on the little indent on the o-ring end of the plug and I ended up bleeding. If your plugs aren't smooth, just leave things be until you NEED to clean.
  • Once you get to a bigger gauge you'll need to let your lobes rest with plugs out for as long as overnight to prevent uneven stretching and large-scale ripping, but apparently just pulling the plugs out for a few minutes every day or so to clean up is fine for smaller sizes. UPDATED TO INFORM YOU that my ears have been doing great without being rested at 14g. Those instructions are more focused on big stretches and heavy plugs. 
A few hours after getting the plug in, Lefty is still red.

While a few hours after being stretched, my right ear is much less angry-looking. 


The Taping Method: This is not something I've done ever, so I've snatched this informative quote. The one thing I feel confident about saying is that you should really research the type of tape you want to use and don't skimp on it. You don't want your skin to fuse to the tape. I've heard really good things about using bondage tape for stretching, since it's designed for kinky, weird situations involving varying levels of moisture and body fluids, which to me sounds perfect for being in constant contact with your fistula. 
At larger sizes, you may find it helpful to use a different method of stretching, called taping. The taping method involves wrapping small layers of teflon, PTFE or bondage tape around a piece of jewelry and reinserting it into your ear. By adding new layers of tape over a period of several days, the diameter of the plug can be increased gradually, allowing for a very safe and comfortable stretch. This method is mostly recommended for stretching to sizes 6g and larger, as the process is much more difficult with smaller jewelry. However, you can begin taping anytime you feel comfortable with it!
From How to Stretch Your Ears 


The Dead Method: This is the technical name for shoving a larger gauge into your ear without stretching first. If you're smaller than 2g, use the taper method, and if you are going larger than 2g or are smaller than 2g but have stiff lobes, use the taping method. If you dead stretch, sooner or later you will blow your fistula right out the back of your ear. This will set you back to a smaller size for at minimum several weeks while your fistula rejoins your lobe, not to mention how much slower you'll have to go to avoid further damaging the mass of scar tissue that is now your fistula.

Link Roundup
A whole slew of sites with varying amounts of pictures and instruction. Found 'em by googling things like "how to stretch your ears," "gauge size chart," and "13 gauge earrings" but I thought I'd put my favorites in the post.
How to Stretch Your Ears
KraftyLady
King's Body Jewelry
Arka
Gauges of all sizes, including the unconventional odd number gauges
Ear Cheese
Screw Yourself
Wikipedia
Sally Beauty Supply
The taper kit I bought from Amazon (although you should be aware that it does have cutouts for the O-rings that can catch on your lobes and be all hurtful)

15 May 2014

Eyebrow piercings don't hurt -- Ninety Eighth Post

The fun continues as I pay people money to poke holes in my skin.
This picture adequately sums up my feelings on people who think body mods are a sin.
Anyway, I'd just like to report that eyebrow piercings hurt way less than any other piercing I've had with the possible exception of my very first ear lobe piercings when I was 13 that I don't really remember anymore. Since I don't remember them hurting, I assume they didn't hurt. To sum up, it hurt less than a nose (nostril) piercing, ear cartilage piercing, that one time I pierced my earlobes by myself because it took me forever to get the damn needle through, and way less than dermals. Dermals hurt like a bitch. I thought that eyebrows would hurt similarly bad because the needle is going through so much flesh and I have sensitive eyebrows, but it was a very brief hot pain and then we were good, with just one tiny tear sitting in the corner of my eye. My eyes water whenever I pluck my eyebrows, so one tiny tear is saying a lot about how much it didn't hurt. 
Anyway, I got my left eyebrow pierced with a slightly curved barbell that just has two normal-boring balls on the ends. Nothing fancy, just the standard stainless steel piercing jewelry. I hear that eyebrows will swell up quite a bit (something about poking a hole under the skin right against a bone and then sticking a piece of metal in it), so starting off with the normal-boring is highly recommended because you don't want your inflamed skin getting all stuck in fancy barbell decorations. Besides, how normal-boring can it be? It's an eyebrow piercing for fuck's sake. Another recommended option is getting a captive ball ring, like you often see on lips and ear cartilage, because it's pretty much impossible for the wounds to grow over the ends of a ring as has been known to happen with barbells that are too short. 
Now my only worry is that I'll keep bumping into it. I've actually almost forgotten that it's there because it stopped hurting so quickly, and so far I've accidentally rubbed my eyebrow, leaned my head against my fist and essentially punched myself in the piercing, and straight up scratched around the piercing because I thought something, like a piece of paper or a feather from my duvet, was stuck to my eyebrow. Something is stuck to my eyebrow, it's just that it's supposed to be there. 
But seriously. So far, probably the easiest piercing I've done. 
Next on the list: tragus, conch (also known as orbital, on the ear), and/or labret (in the center under the bottom lip). I'm really on the fence about the lip piercing. It looks super cute on other people, but I'm not sure I have the right face and the ability not to play with it constantly and ruin my teeth. My teeth are bad enough, they don't need help getting worse. And then, sometime, and sometime after I get a car because saving for that is a huge pain, there will be a tattoo. 

14 May 2014

Hilling Potatoes and Transplanting Tomatoes -- Ninety Seventh Post

One of my weirdly distinct memories from grade school is not knowing how to spell "potato" and/or "tomato" because I couldn't remember which one had an "e" on the end. Turns out, neither one does, except in the plural.
My darling plants are at some crucial stages: the beets really need to go into their forever pots but it's too cold at night, my remaining tomato seedling is about three inches tall and starting to mysteriously lose leaves, I just planted my carrot seeds, and my potatoes have finally sprouted. The peas are doing the best, having all sprouted happily and transitioned easily from their indoor life to their forever pot. I'm going to split credit between their natural hardiness and my clever plan to start them in decomposable pots, thus eliminating stress to their roots during transplanting.
My root and leaf vegetables are all a little iffy. The celery seems to be making a comeback from whatever it was that ailed it, but my kale never sprouted. The bok choy seem to be doing well, but they're still all crowded into a tiny terra cotta pot and I don't think they would appreciate transplant at this point even if I had a good place for them. My surviving beets are all pretty vigorous, but they're growing indoors in temporary pots with no real plan for where to settle them and tend to break at the soil line when exposed to wind. The radishes, in with the celery, are leggy and the parsnips only just sprouted. It could be worse!
Anyway, on to the real reason I started to write this post: potatoes and tomatoes.
Both tomatoes and potatoes have the nifty ability to root from their stems, making it highly lucrative (if your currency is potatoes) to bury the stems or "hill" the potatoes as they grow. For tomatoes, you can increase their health and likelihood of outdoor survival if you bury the stems when you transplant them because it wildly improves and enlarges their root systems. A critical step in cultivating both plants is actually carrying out the burying of stems.
In the case of tomatoes, which those of us in cool climates have to start indoors or buy half-grown, there comes a time when they will be planted in a forever site, be it indoor pot, outdoor pot, or the ground.
Image from http://www.cyber-north.com/gardening/tomato.html
At this point, you will dig a hole big enough that your tomato can sit in it up to its lowest set of leaves. If it's a particularly tall plant and you have a lot of space or it's just really compact and has leaves all the way down to the ground, you can pinch off a few sets of leaves close to the ground. Another nifty trick if you have the space is the trench method, wherein you dig a little trench and plant your tomato sideways, gently training the top at a right angle to the ground so that it grows upright. I really like the idea of this method, but I almost certainly won't have space. For those who start tomatoes from seed, you should repot them at least once before they reach their forever home and bury the stem each time. It's really important for those of us with a little bit of a brown thumb or less than ideal growing conditions, because those extra roots will really give your plant a leg up on its circumstances in addition to renewing the dirt. If you're a hydroponic/aquaponic/non-dirt gardener, I have no idea what to tell you. I have a hard enough time with normal growing, and your way is kind of expensive.
For potatoes, stem-burying comes in the form of hilling. Like the name implies, you build up dirt around the stems, nearly to the tops of the leaves.
Image from https://www.quickcrop.co.uk/product/3-pack-potato-patio-planter
A brief google search indicates that 6-8 inches of stem is the best amount of time to let your potato vines grow before hilling. Since they don't put roots down, but rather out, potatoes are actually fantastic container plants. Just plant your seed potatoes on a few inches of soil in the bottom of a deep container with decent drainage, add another few inches of soil, and wait. Water well. When you've got 6-8 inches of vine, bury all but the top few inches of the plants and wait for the next 6-8 inches of vine to grow. Again, water well, because the buried vines are going to put off a lot of little potato babies and those babies need water to develop. After another 6-8 inches of vines have grown, bury all but the top few inches in dirt, straw, or mulch of some kind (I've seen arguments for everything, so do your own research and see which ought to work best in your particular garden) and (wait for it) water well. Wait for the vines to flower and then die back, then dump your container onto a tarp/plastic tablecloth (or someplace where extra dirt and potato bits are acceptable) and pick through it for your buried treasure. If you plant them in the ground, you'll be able to hill dirt around the stems from nearby, but you'll also have to do actual digging come harvest, which can result in damaged potatoes.

05 May 2014

A Hard Place, or, The Future Scares Me -- Ninety Sixth Post

I'm going to assume that anyone who's found my blog is internet-savvy enough to have stumbled across the brilliant work of Allie Brosh at hyperboleandahalf.blogspot.com and has also read her pieces on depression. I'm not going to lie, they hit me right in the feels. My family has had struggles with depression and anxiety and panic attacks and all the things that a lot of people seem to think aren't "real" illnesses, and an odd phenomenon I've run across is the coolness of suicidal thoughts and self-harm and all that horrible, painful stuff that so often tags along with mental illnesses.
I will admit right here and now to having been a dumb emo teenager with poetic aspirations who wrote really stupid poetry romanticizing people who kill themselves. And I'm sorry.
As a former emo, I can quantitatively say that this is true.

However, my idiotic poetry (which trailed off around age 18 when I got a part-time job and didn't spend 8 hours of every day around other high schoolers), while stupid and indicative of a dangerous trend among youth (darn kids *shakes fist*), doesn't invalidate the fact that I have experienced some horrible feelings and been in hard places. 
I don't have a documented mental illness. I did see a therapist when I was 13 or 14 for some suicidal feelings, but it's been pretty smooth sailing on the mental health front since my therapist taught me coping mechanisms. For people without mental illnesses, overcoming a depressed emotional state can really be as easy as talking through our feelings and learning how to cope with an excess of sad emotions. Sometimes, talk therapy works for people with mental illnesses as well, but sometimes it doesn't. Brains are weird things, and it can take a lot of persuasion to get them to work with you again once they've decided to work against you. 
I've seen my dad, who had always been the strong person in my life, curled up in bed because of panic attacks. You can't just "have a positive outlook" when the dark corners of your brain have you in their grip and getting out of bed is literally impossible. I know a person who would get home from class, turn on all the lights, and hide under a blanket in the middle of the room until her roommates got home because the chemical imbalance in her brain made being alone in the dark the worst possible thing. There was nothing that a "positive thinking" website could have told her that would make it better, no hopeful thoughts that could penetrate the horrors that her mind cooked up to hold her captive. Mental illnesses are a bitch, to put it mildly, and it seems like a lot of "society at large" views them as simply a lack of willpower. That makes me angry, on behalf of everyone who's ever been afraid to share that they're scared of their own mind and everyone who's ever been told to just try harder and think positive and just get out of bed. 
I've cried myself to sleep because the future is long and scary. I'm 23 now, and if I live to be 80, as all my grandparents have done, I'll have almost 60 more years of living. What the hell am I going to do with 57 more years? I ask you. I've got a pretty good idea about the next 5 or 6 (be in grad school), but that's about as far ahead as I can really look without getting a headache. It's a long time to live, and it scares me. 
I view death as a kind of sleep, where you finally get to rest after all the shit life puts you through. I'm not saying people should hurry along to death, because there's wonderful things in life that you don't want to miss out on, but it's like going to sleep after a very long week. Good things and bad things happen, and life has a way of wearing you out. 
If this is how I feel when I'm at the beginning of my adult life, how bad is it going to get when I actually have a daily grind that will extend on for another thirty years or so? Oh my god thirty years is a long time.
How do other people deal with the yawning abyss that is our futures? If we're shooting for the moon and landing among the stars, I feel like I'm passing dangerously close to a black hole.
That whole analogy is ridiculous, of course, since missing the moon doesn't really get you any closer to the stars. Those are very far away. 
This was a terrible post to edit right before bed.
Anyway, to end this on a less distressingly negative note, the future isn't hopeless. I know this. I spend most of my time relatively content and occasionally even excited about whatever's coming next, it's just that the midnight existential crises are more memorable and terrifying. If you're scared of the future, reach out to someone. If you think you might have a mental illness of some kind, find yourself a licensed professional to talk to. Don't count on friends and family for talk therapy, because they'll probably be shocked and fall back on the "just try to be happy" line (unless you happen to have a licensed therapist in your friends and family, but talking to people you don't know is still often better). If you're in a good place with your friends and family you should definitely reach out the them, but know that sometimes paying a stranger to help you in your struggle with your brain is the best option.
I don't have a very lively comment community like some of the cooler blogs, but you can always contact me through the comments if you're scared and alone. I'll read your message and feel some of your pain because I'm stupidly empathetic and try to write you something thoughtful and helpful and non-judgemental. It'll probably take me a couple of days to get back to you because I'll spend a lot of my time agonizing over what I'm writing. My point is, there are a lot of people who've felt feelings like the ones that make you feel alone and scared, and you're not really alone in all this. Maybe it's cold comfort, having someone who sees her future like a black hole tell you that she'll be there for you, but it's always helped me to learn that I'm not alone.

You are not alone.

31 March 2014

Guerrilla Gardening Post of the Whenever I Get Around to Posting: Urban Homesteading -- Ninety Fifth Post

I've recently become enamoured with the concept of urban homesteading, thanks to Bad Mama Genny. My problem is that, when looking for information about ways to get involved with this whole urban homestead thing, most people who put their information on the internet have honest-to-god homesteads that happen to be crammed into an urban setting. I'm not just talking about massive gardens, these people have chickens. And goats. And they homebrew and make their own clothes. Alternatively, they post things like "line dry your clothes" which I already do because the tag tells me to and "make your own laundry detergent" which I refuse to do because I like clothes that don't turn grey. It's also cheaper to buy cheap detergent than it is to buy the ingredients for detergent. "Stuff I have around the house" includes baking supplies, very few cleaning supplies, and zero essential oils. I'm twenty-three, in graduate school, and overly sensitive to strong smells.
So, on the list of "urban homesteading things I want to do," you will find making cheese, making kefir, making yogurt, canning/preserving lots of food over the summer and eating it over the winter (I want to be a locavore so badly but I live in a place with a five-month growing season so that's not going to happen any time soon), homebrewing beer, wine, and hard cider, pressing my own cider, making ten tons of jam, making bread from my own sourdough starter, growing my own food, lactofermenting everything, and sprouting all my grains and legumes before cooking them.
While I have the capability to do pretty much all of these things, even if I don't yet have the equipment, I have two shelves in a small pantry for all my food and I share a standard-size fridge and small freezer with three other people. This equates to having no space for food preservation. I've had some luck with sprouting beans and rice, so the sprouting thing isn't a total loss. All that's left is gardening, which I love, but I have one little problem.
I don't have a yard. There is a very nice west-facing grassy area where everyone in this little strip of four-plexes and two-story apartments walks their dogs and then doesn't clean up their shit, but that's it. The east-facing front yard is 90% driveway, 5% "on the north side of the neighbor's garage," and 4.5% trees and landscaping features. The south side of the building is three units down, so that's out. We do get the north side of the building. Yay, full shade plants!
Bok Choy seedlings demonstrating the value of full shade plants by sitting in a rainy window and doing pretty damn good, if I do say so myself.
So. I have a cement pad that faces west, a west-facing window, the north side of a building, and a heavily-shaded front walk with some eastern exposure and possibly some overhead exposure during the summer.
As the old saying goes, For root or fruit, sun all day; for leaves, shade's okay! or something to that effect. It's supposed to rhyme, and I have zero sense of what rhymes with what. Anyway, the point is that leafy greens are best grown in cool weather in the shade, and anything with an edible root (carrot, potato, radish, parsnip, beet, etc) or seed-containing fruit (such as squash, eggplant, tomato, cucumber, berries, etc) should get full sunlight.
The north side of the building is going to be home to pots with cool-weather, shade-loving crops: celery, and assorted greens including kale and bok choy. These might live on the west side along with peas until it gets too hot and bright.
The west-facing cement pad gets three pots with sun-long, warm weather crops: an eggplant, a tomato, and a zucchini along with carrots, parsnips, beets, and marigolds. Other flowers or herbs might be added in as I find out what companion plants appeal to me.  When it gets too hot for the peas, I'll plant beans in their pot.
The front walk might get one of the sun-lovers once the sun makes its way back up to the northern hemisphere, and it might also be a staging area for the cool-weather crops, since they should probably get at least a little sun. In fact, that's probably where the peas are going to live, along with some daikon radishes.
Because I am impulsive, I have a small problem in paradise: I have a pot with celery, kale, parsnips, and daikon radishes. This happened before I found out that root crops need sunshine, too, and also before I found out that celery counts as a leafy green in that it loves shade. My thought process was that if radishes are cool-weather crops (they are), like leafy greens, then they probably like shade, right? And I really want parsnips right fucking now. Oh, hey, kale seeds!
Note the radish sprouts searching desperately for sunshine.
Oops.
Anyway, I'll get to find out if root vegetables can survive me transplanting them.

Now, on to the entire reason that I sat down to write this post: what the hell can I get away with growing in a container?
Lots, actually. Pretty much every edible plant can be grown successfully in a container, including corn and potatoes. Tomatoes, eggplants, cabbage, cucumbers, summer squash, peas, beans, all manner of leafy greens, and most root vegetables will do pretty well in pots; I'm less certain about large viney squash and melons.
And now, for your gardening pleasure, a by-no-means-comprehensive list of plants that are allegedly happy in containers, with the varieties of each plant that are sold as "compact," "dwarf," or "good for containers" included. Full disclaimer: I have attempted to grow exactly none of these. This list also doesn't discriminate between hybrids and heirloom varieties, either.

Photo from www.grow-it-organically.com

  • Tomatoes: look for dwarf, determinate, bush types if size is a HUGE problem (ahahaha no pun intended), but indeterminate types can grow in any pot if it's big enough. The internet highly advises us to seek out heirlooms, especially indeterminate kinds that are "well-behaved" in pots because the flavor is said to be much better than dwarf types. Many of the varieties on this list are indeterminates that have grown well in pots. 
    • Black Krim
    • Japanese Black Trifele
    • Sungold (cherry)
    • Wapsipinicon Peach (fuzzy)
    • Stupice (I'll be growing this one)
    • Silvery Fir Tree
    • Brandywine
    • Riesentraube (cherry/grape)
    • Cherokee Green (green tomato)
    • Polish Linguisa (paste)
    • Hahms Gelbe Topftomate (cherry)
    • Black Seaman's
    • Czech's Bush
    • Sophie's Choice
    • Whippersnapper (cherry)
    • Korlik (cherry)
    • Principe Borghese (cherry)
    • Supersweet 100
    • Manitoba
    • New Yorker
    • Blue Champion
    • Green Zebra
    • Paul Robeson
    • Carmello
    • Baxter's Early Bush Cherry
    • Elfin
    • Lyana
    • Micro Tom
    • Patio F
    • Red Robin
    • Tiny Tim
    • Totem
    • Yellow Pygmy
http://www.treehugger.com/lawn-garden/10-tomatoes-grow-your-container-garden.html
http://www.hgtvgardens.com/tomatoes/which-tomatoes-to-grow-on-my-patio
http://containergardening.about.com/od/containergardening101/f/Tomato_Varieties.htm
http://tomatoheadquarters.com/container-gardening-2/growing-heirloom-tomatoes-in-pots/
http://www.tomatodirt.com/growing-tomatoes-in-pots-small-containers.html

Photo from www.grow-it-organically.com

  • Eggplant: I'm not a fan of eggplant from the store, but those are always the big fat overripe purple ones. This is a problem because I'm a vegetarian, and eggplant is sort of the vegetarian steak (LIES it is not like steak at all! Eggplant is pretty damn bland all by its lonesome; please do not serve "eggplant steaks" or "eggplant sandwiches" to vegetarians unless we express definite interest), so I intend to find a variety of eggplant that I like. Represented here are some lighter-colored and/or less fat varieties. Japanese eggplants are also nice because they are slender and not huge and fat. I'm currently attempting to germinate "Long Purple" seeds; the experiment will continue until I find one I like or give up on eggplant altogether. 
    • Fairy Tale
    • Hansel
    • Gretel
    • Rosa Bianca
    • Little Fingers
    • Orient Express
    • Applegreen
    • Beatrice
    • Purple Fingerling
    • Calliope
    • Orlando
    • Bambino (Baby Bell)
    • Bride Asian
    • Ophelia
http://containergardening.about.com/od/vegetablesandherbs/a/How-To-Grow-Eggplant-In-Containers.htm
http://www.motherearthnews.com/organic-gardening/eggplant-at-a-glance-zm0z12djzkin.aspx#axzz2xJocAEto
http://www.vegetablegardener.com/item/10658/have-a-small-space-garden-try-dwarf-vegetable-varieties
http://www.extension.iastate.edu/Publications/PM870B.pdf

Photo from http://blog.seattlepi.com/

  • Cucumbers: non-bush varieties can be trellised, but bush varieties are naturally compact and don't require as much vertical space. I desperately want a bush pickle variety, but I don't know if I'll actually enjoy homemade pickles so I'm practicing self-control and waiting until next year while I invest a small amount of time, effort, and money on one batch of homemade pickles with store-bought cukes. 
    • Salad Bush Hybrid
    • Bush Champion
    • Picklebush
    • Spacemaster 
    • Hybrid Bush Crop
    • Midget Bush Pickler 
    • Bush Pickle
    • H-19 Little Leaf
    • Bush Crop
    • Salad Bush
    • Patio Pickle
  • Squash, separated by winter and summer squash varieties. Winter can be harvested in the fall and stored someplace cool for months, while summer goes bad a few days off the vine and is best when small and tender. Anything that doesn't say "bush" will almost certainly vine, except the zucchinis, which are always bushes. 
    • Burpee's Butter Bush (winter)
    • Burpee's Bush Table Queen (winter)
    • Bushkin Pumpkin 
    • Jackpot Pumpkin
    • Spirit Pumpkin
    • Baby Bear Pumpkin
    • New England Pie Pumpkin
    • Sugar Treat Pumpkin
    • Jack-Be-Little Pumpkin
    • Sweetie Pie Pumpkin
    • Aspen Pumpkin
    • A&C Hybrid #300 Pumpkin
    • Jack of All Trades Pumpkin
    • Harvest Moon Pumpkin
    • Bush Acorn (winter)
    • Bush Crookneck (summer)
    • Hybrid Jackpot Zucchini 
    • Black Magic Zucchini (I'll be growing this one)
    • Gold Rush Zucchini
    • Peter Pan Scallop (summer)
    • Sunburst Scallop (summer)
    • Dwarf Summer Crookneck (summer)
  • Melons: they still vine, as far as I can tell, so indoors or shared spaces are probably not good places to plant melons, unless you have the time and supplies to convince them to go vertical. Sigh. There are few things nicer than a cantaloupe when it's still warm from the sun.
    • Sugar Baby Watermelon
    • Golden Midget Watermelon
    • Yellow Doll Watermelon
    • Honey Red Watermelon
    • Minnesota Midget Cantaloupe
    • Emerald Green Cantaloupe
    • Green Nutmeg Cantaloupe
    • Golden Jenny Cantaloupe
    • Petit Gris de Rennes Cantaloupe
    • Sakata's Sweet Cantaloupe
    • Sleeping Beauty Cantaloupe
    • Savor Cantaloupe
    • I looked for dwarf/miniature honeydew melon varieties and couldn't find any listed, although every site that talks about growing melons in containers mentions dwarf honeydew varieties. Heckle your local garden store employees (not hardware-store-that-happens-to-sell-garden-supplies employees, though) if you're desperate for homegrown honeydews. 
  • Beans: pole beans will grow happily in containers if provided with a something to grow up, so they are perfect if you have lots of vertical space.  Bush beans are naturally compact but require more horizontal space, so they're ideal for people without much vertical space.
    • Derby (bush)
    • Provider (bush)
    • Topcrop (bush)
    • Royal Burgundy (bush)
    • Dragon's Tongue (bush) (I'll be growing this one)
    • Tongue of Fire (bush)
    • Cherokee Trail of Tears (bush) (also: nothing like a little white guilt with your dinner)
    • Trionfolo Violetto (pole)
    • Scarlet (pole)
    • Sunset (pole)
    • Golden Sunshine (pole)
    • Chinese Long/Yard Long (pole)
    • Contender
    • Blue Lake 247
    • Tendergreen Improved
    • Kentucky Dreamer
    • Slenderette
  • Beets: any variety should grow pretty well in containers if given enough space, or else the bulb won't develop. I desperately want to like beets. They are so healthy, but I've had exactly one good experience with beets, and that was in an "apple and beetroot juice" when I was roaming London with a nasty cold after my computer got stolen in the last week of my five-month semester abroad. If any part of the beet is involved other than its juice (no pulp, either, thanks), I don't like it. But, but, healthy! So I'll be growing Cylindra in a hail-mary attempt to like them because I grew them. The logic here is flawed, I know. But, beets should do well in Montana and I do tend to like vegetables that I've grown myself more than storebought ones. 
    • Red Ace
    • Ruby Queen
    • Cylindra (I'll be growing these: they are carrot-shaped, not globes, so they do better in smaller spaces)
http://www.extension.iastate.edu/Publications/PM870B.pdf
http://www.seedsnow.com/products/beet-cylindra

BEET UPDATE: Roasted beets are fucking delicious. I got one at the Winter Farmer's Market. Here is how I cooked it:
1. Wash off all the dirt, cut off the tops, and cut into chunks. DO NOT PEEL!
2. Place in a pan on parchment paper, drizzle with oil, and sprinkle on a bit of salt (season to taste, in other words). 
3. Roast at, say, 350 F until you can stab them pretty easily with a fork. My beet took something over half an hour for large-garlic-clove-sized chunks. The same method should work on the grill if you wrap them in foil 
4. Devour, skin and all. 
5. Be amazed at how tasty beets can be, because damn.
I think the difference is that it wasn't canned or preserved in any way, which is the only way I've ever had beets (aside from juiced). Night and day, man. Night and day. 


Photo from http://mytinyplot.com/

  • Carrots: the only limitation is the size of your pot. If it's too shallow, the carrots will just be shorter. If you're really nervous about this, go for one of the round varieties (I've included one on the list) and remember that you don't have to peel it if there's nothing particularly nasty in your dirt. 
    • Danver's Half Long
    • Little Finger
    • Nantes Half Long
    • Scarlet Nantes (I'll be growing these)
    • Chantenay Red Core
    • Adelaide
    • Paramex (round)
    • Flyaway
    • Maestro
  • Greens: have nice shallow root systems, so they work really well in containers. They also like shade, another plus for the indoor gardener or the heavily-shaded gardener. Not so good for the gardeners with full sun and only full sun. I really only included this list for people who can't function without lists. 
    • Lettuce
      • Black Seeded Simpson
      • Green Ice
      • Green Salad Bowl
      • Red Sails
      • Red Salad Bowl
      • Buttercruch
      • Tom Thumb
    • Spinach
      • Long Standing Bloomsdale
      • Melody
      • Tyee
      • Renegade
    • Swiss Chard
      • Fordhook Giant
      • Lucullus 
    • Kale
      • Dwarf Blue Scotch
http://www.ufseeds.com/Container-Gardening-Vegetables.html

  • Cabbage: I'm completely sold on the benefits of lactofermented sauerkraut, but I'm not ready to plunk down a lot of time and effort on a plant that I might not have a use for. I certainly don't have space for it. Anyway, cabbages will grow happily in containers, but I've tried to include mostly little guys to make up for the other vegetables where I couldn't find much information on size. In the space I've got, I'd only have space for one plant anyway.

  • Photo from www.grow-it-organically.com
    • Baby Head 
    • Dwarf Morden
    • Minicole
    • Fast Ball
    • Flash
    • Parel
    • Gonzales
    • Red Express
    • Savoy Express (not a head cabbage)
    • Primero
    • Ruby Ball
    • Kaitlin
    • Danish Ballhead
    • Storage No. 4

http://ohioline.osu.edu/hyg-fact/1000/1647.html
http://www.grow-it-organically.com/cabbage-varieties.html

Photo from http://www.gardeningclub.com/

  • Corn: still needs vertical space, and you should plant multiple plants within a few feet of each other so they can pollinate each other. Stick with one variety, though, because corn plays fair with mendelian genetics and can make some horrible hybrids. 
    • Kandy Korn
    • Early Gold Bantam
    • Sweet Spring Treat (short)
    • Sweet Painted Mountain (short)
    • Trinity (short)
    • Chires Baby Sweet (short) 
  • Broccoli: just in case you're interested. I'm not growing any because I'm not big on broccoli. 
    • Calabrese
    • Waltham 29
    • Coronado Crown
  • Cauliflower: like broccoli, I'm not that big on growing it myself. It takes up a lot of space and you only really get one harvest per plant. 
  • Photo from http://janedata.wordpress.com/

    • Snow Crown
    • Early Dawn
    • Early Snowball
  • Peas: yet another plant that should grow well in containers regardless of variety. Look for compact types if vertical space is an issue, or you don't want the hassle of trellising and staking. Some of these require trellising.
  • Photo from www.burpee.com
    • Little Marvel (I'll be growing these)
    • Sugar Snap
    • Tom Thumb
    • Early Frosty
    • Oregon Sugar Pod
    • Markana
    • Gemini
    • Snow peas in general
    • Sugar Snap-type peas in general
    • Burpee's Peas-in-a-Pot (I am all kinds of getting these next year)
  • Potatoes: pretty much any potato, including sweet potatoes, will grow happily in grow bags or large buckets. Just remember to plant your seed potatoes at the bottom of the container and gradually add more dirt as the plants get taller. Potatoes love being in hills. However, here's a few varieties that are supposed to grow especially well in containers. I'll be growing some purple fingerlings that I got from the winter farmer's market because I'm a rebel. 
    • Red Pontiac
    • Kennebec
    • Yukon Gold
    • Adirondack Blue
  • Radish: I only like daikon radishes cleverly cooked into delicious foods, not spicy raw radishes. If you're into the little round spicy kind, pretty much any of them can be grown in containers. The only problem with daikons is that you need a nice deep pot, which I have. Here are a few varieties for the list-dependent who don't know if they like radishes yet. 
    • Cherry Belle
    • Easter Egg
    • Champion
  • Pepper: I don't even like bell peppers 99% of the time. I'll eat the damn things if they're in my food or offered to me, but I don't do spicy peppers at all. I put this list here because I'm a nice person and also a masochist. 
    • Anaheim Chili (hot)
    • Sweet Banana (mild)
    • Early Jalapeno (hot)
    • Corno Di Toro (frying, whatever that means)
    • Cubanelle (hot)
    • Cherrytime (hot)
    • Apple (hot)
    • Red Cherry (hot)
    • Red Chili (hot)
    • Lady Bell (bell)
    • Gypsy (mild)
    • Crispy (mild)
    • New Ace (bell)
    • Bell Boy (bell)
    • Sweet Chocolate (bell)
    • California Wonder (bell)
    • Early Thickset (bell)
http://www.ufseeds.com/Container-Gardening-Vegetables.html
http://www.ifplantscouldtalk.rutgers.edu/planttalk/article.asp?ID=17


  • Berries: since berries are perennials, you'll have to figure out how to overwinter them if you live in a cold climate. Because pots are exposed on all sides to the cold, the soil is more likely to freeze solid and kill your plants. However, most berries will grow happily in pots provided you keep them warm enough.
  • Photo from www.fallcreeknursery.com
    • Blueberries: actually grow best in pots because they require high soil acidity, and it's much easier to modify your soil when it's just a few pots. Try to group two or three together to improve harvests. 

      • Top Hat (dwarf)
      • Peach Sorbet (dwarf)
      • Sunshine Blue (semidwarf) 
      • Sunshine Dwarf (dwarf)
      • Northblue (half high)
      • Northsky (half high)
      • St. Cloud (half high)
      • Polaris (half high)
      • Chippewa (half high)
      • Northland (half high)
      • North Country (half high

    • Raspberries: contained spaces are great because raspberries propagate themselves via their roots. They only produce fruit on new growth, so gardeners are advised to cut them down to an inch or so above the soil every fall. This is, funnily enough, perfect for overwintering in the garage, if your garage doesn't go too far below freezing. Mine isn't insulated and pots freeze solid. A couple of these varieties are extremely cold-hardy, but I don't know if that extends to pots. 
      • Autumn Bliss (medium canes)
      • Meeker (upright)
      • Heritage (tall canes, needs staking)
      • Nova (upright)
      • Boyne (upright)
      • Tulameen (long canes)
      • Fall Gold (short canes)
      • Raspberry Shortcake (dwarf)
    • Strawberries: any variety will produce fruit in containers, but shoot for day neutral and alpine varieties, since June bearing and everbearing varieties tend to need more space, and, in the case of June bearers, send out lots of runners. I was growing some white pineapple alpines, but I repotted them and they all died. This is why I'm concerned about transplanting things. 
    • Photo from http://www.kathrynseckman.com/

      • Evie (day neutral)
      • Albion (day neutral)
      • Seascape (day neutral) (I just bought one of these)
      • Mignonette (alpine)
      • Rugen Improved (alpine)
      • Yellow Wonder (alpine)
      • Any Fragaria Vesca variety (alpine) (I'll be growing two of these: White Soul and Woodland Strawberry, and I killed a bunch of Pineberry Fruit when I tried to repot them)
    • Blackberries: thornless varieties exist! Most if not all of these are thornless, making them easy to handle if you need to move them. It also looks like most of them require trellising, so space requirements might be way too high for apartment dwellers without a roof.  
    • Photo from http://forums2.gardenweb.com/
      • Loch Maree (upright)
      • Black Satin (upright)
      • Chester (upright)
      • Hull Thornless (upright)
      • Boysen (trailing)
      • Logan (trailing)
      • Arapaho (upright)
      • Navaho (upright)
      • Apache (upright)
      • Helen (upright)
      • Loch Ness (upright
      • Triple Crown (upright)
http://www.rhs.org.uk/Plants/Plant-features/Blackberries-and-hybrid-berries

  • Fruit trees: Any dwarf variety can be grown in a large enough pot. Citrus and other warm weather natives will live inside during the winter and be happy, but you'll need to overwinter deciduous trees somewhere less cold than outside if you live somewhere that gets too cold (I feel like zone 5 is when you start needing to take pots inside, but that might be a despicable lie). I'm not going to list varieties because I am done with making this list and also, just go to a local nursery and inquire after dwarf fruit trees. 
Coming sooner or later, probably later, if ever, let's face it: A list of zone 4 friendly plants and plants that do well in short seasons!
This next list will focus on plants that can thrive in containers in my particular hardiness zone, with my local short growing season (because it snows until April and freezes solid in November). I'll be relying heavily on this post, which does a fantastic job of making it stupid-easy to plan gardens no matter what hardiness zone you live in. Also it helps you find your zone.